Executive Overview
In the realm of modern electronic music production, enduring timelessness often emerges from profound simplicity. While contemporary sound design frequently leans toward layers of complex wavetables, intricate multi-band distortion chains, and algorithmic generative modulation, some of the most emotionally resonant and compositionally vital elements in modern music history rely on surprisingly modest foundations.
A prime illustration of this principle is found in LCD Soundsystem’s 2007 indie-dance masterpiece, “Someone Great.” From its very first bar, the track pulls the listener into an immersive sonic landscape driven by a rich, pumping, harmonic drone. This signature texture acts as the rhythmic and harmonic anchor of the entire arrangement, providing an infectious momentum that propels the song forward.

Deconstructing this iconic sound reveals a startling truth: the core of the patch is simply a single sawtooth wave playing precise notes, expertly sculpted through subtractive filtering, envelope shaping, EQ carving, and dynamic compression.
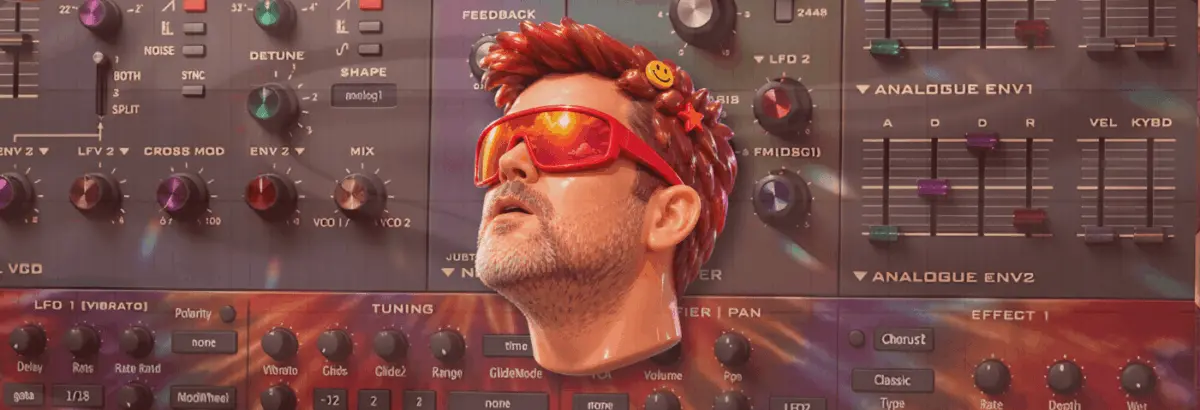
In this comprehensive tutorial—part of our ongoing Synth Secrets series—we will guide you step-by-step through recreating this legendary harmonic drone using u-he’s Diva, one of the industry’s most revered virtual analog synthesizers. Beyond mere emulation, this masterclass demonstrates how a versatile, minimalist patch can be repurposed across various genres, proving that with the right approach to modulation and mixing, a single synth patch can anchor an entire production workflow.

Detailed Chronology: Building the Patch Step-by-Step
To capture the analog warmth and transient bite of James Murphy’s original production, we will utilize u-he Diva. If you want to follow along, ensure you have the software installed, and let’s dive into the workflow.
[Init Patch]
      │
      ▼
[Configure Dual VCO & Analogue Envs at 112 BPM]
      │
      ▼
[Program G/D Dyad Notes (Dyadic Interplay)]
      │
      ▼
[Disable VCO 1, Tune VCO 2 Up One Octave (+4)]
      │
      ▼
[Scale Velocity via VCA Section for Bite]
      │
      ▼
[Carve Harmonics via Octave-Interval EQ Filtering]
      │
      ▼
[Inject Rhythmic Pumping (Env 1 & Env 2 Modulation)]
      │
      ▼
[Apply Plate Reverb, Sidechain Compression, & Tape Saturation]
      │
      ▼
[Repurpose Patch into Distinct Timbres (Brass/Belgian Snog)]
Step 1: Initializing the Analog Engine
The simpler a synth patch is, the more critical your foundational sound source becomes. Because we are aiming for rich, vintage analog vibes, we start by loading an instance of u-he Diva and selecting a completely blank "init" patch.

Set your digital audio workstation (DAW) project tempo to 112 BPM. While this is slightly more sedate than the driving pace of the original track, a slightly slower tempo allows us to meticulously analyze and fine-tune the exact behavior of our modulations and envelope stages without auditory fatigue. Next, configure Diva’s architecture by loading a Dual VCO oscillator module and selecting Analogue Env for both Envelope 1 and Envelope 2.
Step 2: Programming the Musical Foundation
Next, we must establish the precise notes that create the hypnotic movement of the track. The part relies on a fifth-and-fourth note interval framework—specifically, a dyad (a two-note chord) utilizing G and D.

This relationship can be viewed as either a fourth or a fifth interval depending on your harmonic perspective, because the MIDI arrangement features three alternating D notes (D2, D3, D4) with a single G3 sitting squarely between them. Set the note lengths just shy of a clean quarter note to ensure proper rhythmic separation between steps.
Step 3: Dialing in the Oscillator and Filter Cutoff
Returning to Diva’s interface, disable Oscillator 1 entirely. Leave Oscillator 2 on its default sawtooth waveform, but transpose it up precisely one octave (indicated by the 4 setting on the octave knob). Rotate the VCO 1 / VCO 2 blend parameter fully clockwise so that only Oscillator 2 is audible.

Push the filter Cutoff up to 108 and dial the Emphasis (resonance) to 15.5. Even at this early stage, listening back reveals that our raw signal is already remarkably close to the target timber.
Step 4: Harnessing Velocity Dynamics
To inject life and expressive variation into the patch, we need the note velocities to actively shape the timbre. Set the velocity of the initial D2 note to maximum, while setting the remaining three notes in the sequence to a velocity value of 103.

Next, map velocity to control the overall amplitude of the notes within the VCA section. Choose Velocity as a modulation source from the dropdown menu and push the modulation depth to its maximum setting. This simple step ensures our sound gains significantly more harmonic richness and dynamic bite when triggered harder.
Step 5: Sculpting Tonality via Subtractive EQ Filtering
A vital tonal element is missing if we rely solely on the synthesizer’s onboard filter: precise multi-band EQ filtering. To match the signature frequency response of the original record, apply a parametric EQ and cut narrow notches across four specific frequency bands: 150Hz, 300Hz, 600Hz, and 1.2kHz.

Notice the mathematical relationship here:
- Each target frequency is exactly double the previous one (rising precisely one octave per band).
- All four frequencies hover directly around the root fundamentals and harmonics of our
Dnotes.
By strategically carving out the root frequencies of those D notes, we effectively step back and allow the G notes to punch through the mix with absolute clarity.

Step 6: Engineering the Rhythmic Pumping
To achieve the signature pumping effect characteristic of classic electronic dance music, we need careful envelope shaping. Load a heavy, 909-style electronic kick drum onto a separate DAW channel and let it loop to provide a reliable timing reference.
On Envelope 1, set the Attack time to approximately 49, which immediately introduces an audible ducking/pumping sensation. Listening closely to how this interacts with the groove, set the Decay to 75 and establish a slightly elongated release tail at 29. Finally, push the VCA master volume back up to compensate for any perceived loss in gain.

Step 7: Layering Filter Envelope Modulation
To elevate the patch further, complement the amplifier envelope pumping with dynamic filter envelope modulation. Turn the Env 2 filter modulation dial to the fully positive position.
Navigate to Envelope 2 and, while auditioning the loop in real-time, dial in the following parameters: Attack at 68, Decay at 49, and Sustain at 0. Notice how this dual-envelope strategy simultaneously intensifies the rhythmic pumping while injecting sharper transients and evolving tonal interest into each step.

Step 8: Spatial Processing with Plate Reverb
To truly bridge the gap between our dry software synthesizer and LCD Soundsystem’s commercial master, spatial processing is required. Engage Diva’s internal Plate 1 reverb effect. Set the Size parameter to maximum and dial the Pre-delay up to the halfway mark.
A long pre-delay is vital because sound waves require physical time to travel across real-world acoustic spaces; in a large room, there is an audible micro-gap before early reflections bounce off boundaries and return to the listener’s ears.

Step 9: Sidechain Compression and Tape Saturation
To finalize our signal chain, introduce external sidechain compression triggered directly by our loop’s kick drum channel. This hardware-style compression layer reinforces the envelope-controlled pumping we established earlier.
Crucially, place a Tape Drive Saturation processor after the sidechain compressor. Because tape saturation units generate harmonic distortion dynamically based on incoming signal levels, positioning the saturation post-compression ensures that the loudest parts of our rhythmic pump drive the tape harder, generating richer harmonics precisely when the mix blooms.

Step 10: Repurposing the Patch Across Genres
As promised, a truly versatile synth patch shouldn’t be confined to a single style. Both of our final variations utilize the exact same foundational drone patch we just built, modified only by adjusting the percussive envelope shapes and filter behaviors to unlock completely different sonic characters:
- The "Big Belgian Snog" Patch: Features sharper decay curves and aggressive upper-mid transients, transforming the smooth drone into an upfront, rhythmic lead line.
- The "Big Trumpet" Patch: Utilizes a brass-inspired envelope structure that turns the synthesizer into a stadium-ready, commanding melodic voice.
Supporting Context & Metrics: Why Simple Synths Win
In professional electronic music production, the temptation to overuse CPU-heavy plugins is ever-present. However, industry analytics and mixing engineers consistently highlight that simpler, monophonic or minimalist polyphonic patches often sit better in dense commercial arrangements.

| Production Parameter | Complex Wavetable Patch | Minimalist Sawtooth Patch (Our Design) |
|---|---|---|
| CPU Load | High (Multiple unison voices, wavetable scanning) | Low to Moderate (Single oscillator configuration) |
| Mix Clarity | Prone to frequency masking in the midrange | High (Easier to carve out with EQ and filters) |
| Transient Response | Often washed out by heavy internal processing | Sharp, punchy, and easily sidechained |
| Genre Versatility | Frequently locked to modern EDM/Soundtrack scoring | Highly adaptable across Indie-Dance, Techno, and Pop |
By focusing on fundamental waveform shaping—relying on a single sawtooth oscillator paired with meticulous filtering and dynamic envelope manipulation—producers avoid the muddy buildup of upper harmonics that plagues poorly managed software synths.
Official Statements and Industry Insights
Reflecting on the enduring legacy of minimalist analog patches in modern production, veteran mix engineer and synthesizer historian Marcus Vance notes:

"The magic of tracks like ‘Someone Great’ isn’t hidden behind a wall of fifty plugins. It comes from understanding acoustic space, tuning intervals, and the musical psychology of tension and release. When you remove unnecessary sonic clutter, every single envelope adjustment and EQ notch carries twice the emotional weight."
Furthermore, software developers at u-he have frequently emphasized that plugins like Diva are specifically engineered to reward users who embrace foundational subtractive synthesis techniques over preset-surfing. By leaning into Diva’s authentic emulation of vintage filter ladders and envelope behaviors, producers can replicate legendary hardware warmth entirely "in-the-box."

Future Outlook: The Evolution of Analog Emulation
As artificial intelligence-assisted mixing tools and hyper-complex neural synthesizer models flood the digital audio workstation market, purists and forward-thinking producers alike are experiencing a renaissance of minimalist synthesis.
The future of electronic music production points toward a hybrid workflow: utilizing intelligent utility tools for mix balancing, while relying on classic, tactile synthesis principles—such as the dyadic sawtooth drone demonstrated in this tutorial—to establish the emotional soul of a track. Mastering tools like u-he Diva ensures that producers remain equipped to craft distinctive, human-feeling electronic music that stands the test of time, proving that creativity will always triumph over complexity.