
In the modern landscape of electronic music production, producers are spoiled for choice. Libraries overflow with millions of pristine, pre-packaged kick drum samples, ranging from vintage analog recreations to hyper-processed, modern club weapons. Yet, despite the sheer convenience of drag-and-drop sample browsing, a growing cohort of producers is returning to the fundamentals of sound design. Programming your own kick drums from scratch is not merely an exercise in nostalgic purism; it is a vital workflow choice that grants absolute control over frequency response, transient impact, pitch envelopes, and tonal resonance.
By building a custom kick drum from the ground up using a subtractive synthesizer like u-he’s Diva, producers can eliminate the phase cancellation, muddy sub-frequencies, and generic character often associated with recycled sample packs. This comprehensive guide, adapted from expert studio methodologies, explores a step-by-step masterclass in synthesis. We will break down how legendary hardware units like the Roland TR-808 and TR-909 achieved their iconic thump, how to configure dual oscillators for layered analog impact, and how to harness advanced envelope shaping to forge custom-tailored kicks for house, techno, and beyond.

Detailed Chronology: A 7-Step Masterclass in Synth Kick Design
Creating a powerful, professional-grade kick drum does not require a massive modular rig or overly complex routing. Using a versatile virtual analog synthesizer like u-he Diva, the entire process takes mere minutes. Follow this chronological breakdown to build your custom low-end foundation.
Step 1: Initializing the Patch
Every iconic electronic kick drum ever created shares a fundamental secret: its meaty core relies on a lightning-fast pitch envelope applied to a simple oscillator waveform, such as a sine or triangle wave. This was the foundational architecture of the legendary TR-808 and TR-909 drum machines. To replicate and modernize this approach, open your digital audio workstation (DAW), load an instance of u-he Diva, and initialize a fresh patch to clear out any unwanted modulations or effects.

Step 2: Configuring Synth Modules and MIDI Programming
With your initialized patch ready, configure Diva’s modular architecture to lay the groundwork for percussion processing. Select the following module parameters:
- Oscillators: Dual VCO
- High-Pass Filter: HPF Pre
- Low-Pass Filter: Multimode
- Envelopes: Analogue (assigning both Envelope 1 and Envelope 2 to analog behavior for organic drift and response).
Next, program a standard four-to-the-floor kick pattern inside your MIDI piano roll, targeting F#1. Keep the MIDI notes remarkably short—set them to a 1/16th note length. This brief gate time ensures that your synth’s release and decay stages remain tightly controllable, preventing unwanted note overlap and leaving plenty of room for creative length adjustments later in the session.

Step 3: Dialing in DCO Settings and Oscillator Blending
With the framework established, shift your attention to the digitally controlled oscillators (DCOs).
- Set Oscillator 1 to a triangle wave, which serves as your primary 909-style layer with its distinct upper-mid harmonic content.
- Set Oscillator 2 to a sine wave, introducing the deep, pure sub-bass characteristics reminiscent of the 808.
To ensure both oscillators react uniformly to your pitch modulation, set the Tune MOD mode to "BOTH". Finally, engage the SYNC parameter. This guarantees that both oscillators trigger at the exact same phase point every time a note is hit, completely eliminating intermittent phase cancellation and comb filtering between the two waveforms.

Step 4: Forging the Core Pitch Envelope
Up to this point, your synth is playing a sustained musical note. To transform it into a punchy kick drum, you must harness a pitch envelope.
Set the Tune MOD Env parameter to its maximum positive value (+). Because Envelope 2 is now directly controlling the oscillator pitch, adjust its parameters by dropping the Sustain and Release controls down to zero. As you trigger the patch, you will immediately hear the pitch dropping rapidly from high to low upon every transient strike. Slowly pull the Decay control down until you reach a sweet spot—around 32—and suddenly, your synthesized tone snaps into a recognizable, punchy kick drum.

Step 5: Sculpting the Amplitude Envelope
Tailoring your kick’s decay and release is essential for defining its character in the mix. Navigate to your amplifier envelope and pull the Sustain parameter down to zero. Next, experiment with raising the Release parameter from 20 to 50.
The release time functions as your primary kick-length control. As you adjust it, you will notice that it does more than just shorten or lengthen the sound; it fundamentally dictates the tonality. Short release settings deliver tight, punchy, TR-909-style transient hits, whereas longer settings introduce a heavy, tonal resonance ideal for hypnotic underground techno and hard-hitting dance tracks.

Step 6: Harnessing the Filter for Iconic "Click"
The filter section is your secret weapon for sculpting the sharp, distinctive transient "click" that gives acoustic and analog kick drums their cutting edge.
Set the low-pass filter’s Envelope 2 amount to fully positive (+), then sweep the Cutoff frequency down to approximately 34. This rapid modulation of the filter cutoff opens and closes the filter instantly upon impact, generating a crisp, high-frequency transient click.

At this stage, take a moment to audition your oscillator mix:
- Oscillator 1 (Triangle): Delivers a tight, aggressive, click-heavy 909 character.
- Oscillator 2 (Sine): Provides a smooth, deeply saturated, resonant 808 sub-bass foundation.
Step 7: Fine-Tuning and Pitch Editing
To seat your custom kick drum perfectly within the key of your track, utilize Diva’s Fine Tune parameter to adjust the fundamental pitch up or down by fractions of a semitone.

You can also experiment with altering your MIDI trigger note values and gate lengths. While subtle on short kicks, changing trigger notes dramatically alters the tonal resonance of kicks featuring extended release times. This technique is particularly effective for programming rolling bassline fills and percussive melodic variations.
Supporting Context & Metrics: Why Synthesize Over Sampling?
The debate between sample curation and synthetic sound design is a cornerstone of modern electronic music discourse. While sample packs offer immediate gratification, reliance on pre-recorded audio presents significant technical limitations in professional mixing environments.

1. Frequency Control and Sub-Bass Clarity
Pre-recorded kick samples often arrive pre-processed with heavy compression, limiting, and saturation. When producers attempt to layer these samples with sub-basslines, conflicting low frequencies frequently result in mud, phase cancellation, and dynamic masking. By synthesizing your own kick using pure sine and triangle oscillators, you retain absolute authority over the fundamental frequency (typically ranging from 40Hz to 60Hz), ensuring pristine low-end translation across club sound systems.
2. The Analog Emulation Advantage
Software synthesizers modeled on vintage hardware—such as u-he Diva, which emulates classic analog circuits—introduce subtle, organic variations in pitch, phase, and filter response. Unlike static audio files, synthesized drums breathe with every trigger, adding warmth and organic cohesion to otherwise sterile digital productions.

Expert Bonus Tips for Advanced Producers
Once you have mastered the core synthesis of your custom kick drum, apply these advanced studio techniques to elevate your productions from amateur to release-ready.
Bonus Tip 1: The Sub-Bass Layering Strategy
Synth kicks engineered with long decay tails make exceptional sub-bassline tools. To use this to your advantage, layer your custom synth kick underneath a separate, punchy transient sample. Raise the amplitude envelope of the synth kick by a fractional amount to let the sub frequencies bloom underneath. This configuration delivers the massive low-end weight of a sustained sub-bass without cluttering the transient window or masking your primary acoustic-style kick sample.

Bonus Tip 2: Audio Rendering to Eliminate Phase Drift
Because analog emulation plugins introduce minor, organic variations in oscillator phase and filter behavior with every trigger, consecutive hits in a rolling sequence may sound slightly different. While this adds organic warmth, it can disrupt the rigid consistency required for peak-time club bangers.
The Solution: Render your Diva kick down to an audio file, isolate a preferred quarter-bar section, and loop that audio region. This locks in absolute consistency for your transient hits while retaining the rich analog character of the original synthesis.

Bonus Tip 3: External Processing is Mandatory
Synthesized patches straight out of a virtual analog instrument are inherently dry and uncompressed. To transform your custom kick into a professional mixing weapon, route the signal through a dedicated drum compressor (such as a VCA-style compressor with a fast attack and auto-release) to glue the transient to the tail. Follow this with precise EQ notch filtering to carve out space for your bass and snare elements.
Future Outlook: The Evolution of Percussive Synthesis
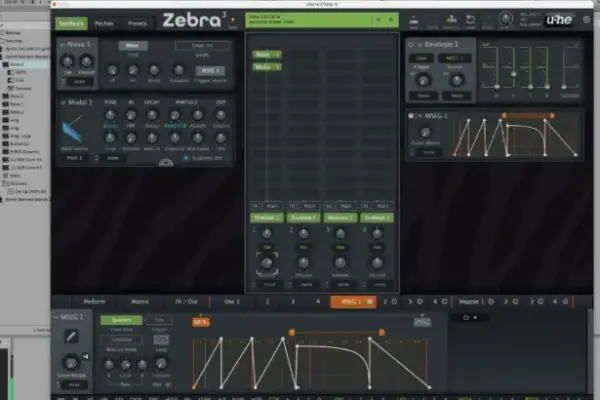
As virtual studio technology advances, the boundary between physical modeling, analog emulation, and sample-based workflows continues to blur. Instruments like u-he Diva and advanced modular platforms like Zebra 3 empower modern electronic music producers to move beyond the limitations of static sample libraries.

By mastering the fundamentals of oscillator pitch envelopes, filter modulation, and envelope shaping, producers ensure their sonic identity remains entirely original. In an industry saturated with recycled audio packs, the ability to build a world-class kick drum from a simple initialization patch remains one of the most valuable skills a modern sound designer can possess.
To dive deeper into advanced electronic music production techniques, explore industry-standard educational resources like The Secrets of Dance Music Production and comprehensive producer manuals available via Attack Magazine.