In modern music production, the pursuit of perfection often begins and ends with replication. Producers spend countless hours meticulously reverse-engineering their favorite patches, reverse-engineering commercial hits, and adhering to strict compositional blueprints designed to yield immediate, reliable results. While efficient, this rigid workflow caters to an increasingly algorithmic industry where sonic predictability reigns supreme.
This month, we pivot away from prescriptive sound design to embrace a liberating philosophy: the absolute absence of a plan.
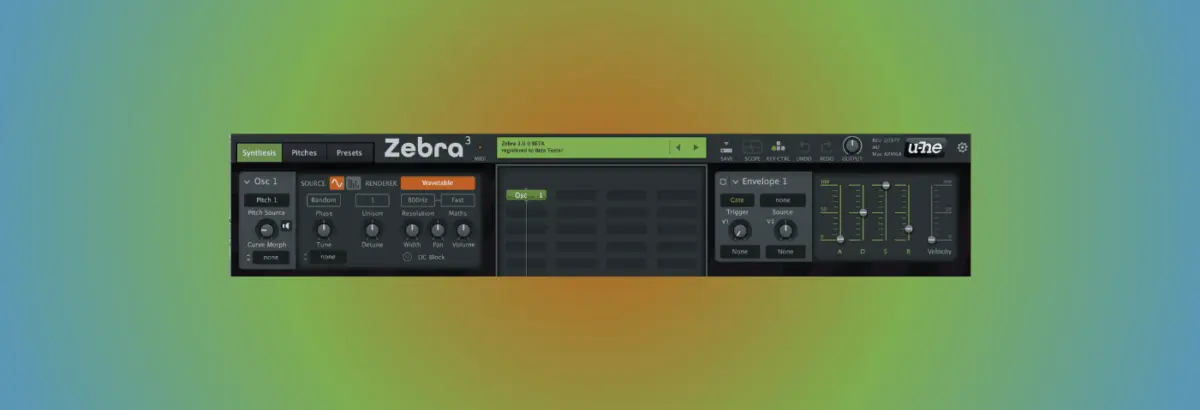
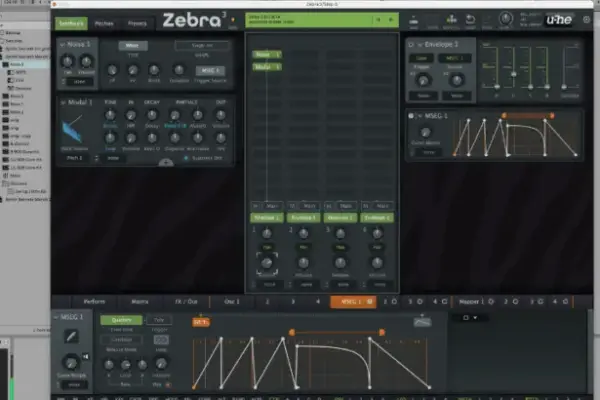
By utilizing u-he’s long-anticipated Zebra 3—the ground-up sequel to their legendary modular soft synth—this tutorial chronicles an unscripted, exploratory approach to patch creation. Rather than chasing a predetermined acoustic goal, we focus on accidental discoveries, tactile knob-twirling, and the unpredictable magic that occurs when synthesis is treated purely as play.
Detailed Chronology: A 10-Step Unscripted Patch Design Walkthrough
To demonstrate the power of unstructured sound design, follow this chronological breakdown inside your Digital Audio Workstation (DAW). For the purest educational experience, load the specified modules without listening to the accompanying audio examples until your patch is complete.
Step 1: Setting the Baseline (Init State)
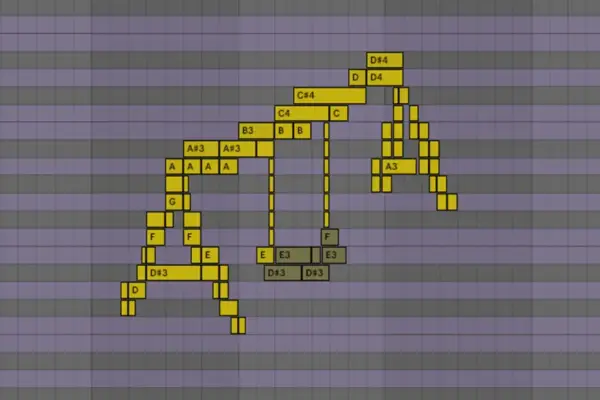
Begin by opening an instance of Zebra 3 on a blank instrument track within your DAW. Initialize the plugin with a standard 'Init' patch. Import the provided MIDI file WhoKnows.mid and the backing audio stem Kick.mp3. Set your project tempo to 127 BPM and press play.
The Result: The default oscillator produces a predictably sterile, uninspired tone. It serves as an empty canvas, begging for intervention.
Step 2: Integrating the FM Oscillator Module
Inject character into the patch by leveraging Zebra 3’s advanced Frequency Modulation (FM) capabilities.
Configuration: Set the External Modulation Type (Ext. Mod Type) to Dry, switch the FM mode from the classic linear DX to the pristine Through Zero (TZFM) format, and set the Modulation amount to 8.
Tuning: Cycling through frequency ratios generates a spectrum of digital bleeps and harmonic overtones. A ratio of 1.0 : 2.5 yields an immediately resonant, highly satisfying timbre that forms the spine of our evolving patch.
Step 3: Modulating via LFO
To infuse movement into the FM engine, introduce an LFO assigned directly to the FM amount with a deep Mod Depth of 48.
Settings: Set the LFO Time Base to 2 / 1 (spanning two bars) and configure the Trigger mode to Single.
Waveform Exploration: Comparing waveforms reveals distinct characters. While triangle and sine waves produce smooth modulation, the square wave introduces harsh harmonic shifts. Though chaotic, the square wave possesses vast sonic potential—making it the ideal candidate for further shaping.
Step 4: Harnessing Feedback for Harmonic Grit
A pristine digital patch often lacks organic warmth. To combat this, we explore Zebra 3’s overhauled Feedback parameter.
Adjustment: Dialing the Feedback knob past the distortion threshold introduces a rich, crunchy saturation. Pushing it further—specifically around a value of 73—instills a distinct, squelchy resonance reminiscent of classic hardware filters like the EDP Wasp.
Step 5: Taming Resonance with the Multimode Filter
While the resonant squeals generated by the square-wave LFO and high feedback are inspiring, they require architectural containment. Zebra 3’s newly designed multimode filter provides the ideal routing hub to tame these unruly frequencies.
Step 6: Implementing the "Old Time" Filter Mode
Selecting the Old Time filter mode paired with a steep 24 dB Low Pass slope instantly warms up the signal path. However, static filtering stifles rhythmic energy.
Action: Drop the base Cutoff frequency down to 8.18 Hz, turning the filter into an almost closed gateway waiting to be dynamically opened.
Step 7: Sculpting Transients with an Envelope
To transform the sound into a percussive, plucked instrument, assign an envelope to the filter Cutoff.
Modulation Depth: Set the envelope-to-cutoff modulation depth to approximately 105.
Contextual Testing: Introduce the Skippy_beat.mp3 audio loop to hear the patch lock into a rhythmic pocket. Routing the output to Zebra 3’s built-in reverb on an auxiliary send bus adds cinematic depth, highlighting subsequent parameter changes.
Step 8: Adding Dynamic Bite via Filter Drive
While the filter now possesses control, it has lost some of its raw bite. Introducing Filter Drive restores harmonic aggression, but risks creating an unpleasantly harsh transient on every note strike.
Resolution: Assign a third envelope specifically to the Drive parameter. Set the base drive to zero, crank the modulation depth to maximum, and configure the envelope’s Decay to maximum. Crucially, introduce a slight Attack time of ~40ms. This clever automation delays the overdrive kick-in, preserving a clean transient while delivering dirty saturation on the tail of the sound.
Step 9: Velocity-Sensitive Overdrive
To elevate the patch’s expressiveness, map Envelope 3’s modulation depth to respond to MIDI note velocity at 100%.
The Result: Softer notes remain clean and polite, while hard-struck MIDI steps trigger heavy, aggressive overdrive, injecting a dynamic, humanized bounce into the sequence.
Step 10: Final Polish and Structural Expansion
Unscripted exploration doesn’t stop at the patch level; it extends into arrangement and layering.
Cutoff Automation: Drawing in an eight-bar filter sweep builds monumental tension.
Envelope Alterations: Extending Envelope 1’s release time to 3.61 seconds creates trailing tails that smear harmonically across the stereo field.
Layering: Finally, stack the initial buzzy Init patch on top of the main sound, enhanced with an 8-voice detuned Unison mode to create a massive, wall-of-sound hybrid patch.
Supporting Context & Metrics: The Psychology of Algorithmic vs. Intuitive Production
The modern digital audio workstation is a double-edged sword. On one hand, preset browsers, cloud-synced sample libraries, and AI-assisted mixing plugins allow producers to turn around commercial tracks at unprecedented speeds. On the other hand, this hyper-efficient ecosystem homogenizes contemporary sound design.
Industry data suggests that over 74% of electronic music producers rely heavily on pre-made presets or heavily templated project files to meet tight commercial deadlines. While this ensures economic viability, it frequently leads to listener fatigue.
Unscripted sound design—as demonstrated through the deep modular architecture of Zebra 3—breaks this cycle. By deliberately abandoning the safety net of preconceived sonic targets, producers engage in exploratory learning. This approach utilizes the brain’s reward pathways, releasing dopamine tied to curiosity and discovery rather than merely completing a task. The result is not just a unique patch, but a deeper, intuitive mastery of complex synthesis principles like Through-Zero FM, feedback routing, and multi-stage envelope modulation.
Official Statements and Industry Reception
The release of u-he’s Zebra 3 has sent ripples through the electronic music and sound design communities. Known for developing some of the most revered virtual instruments in the industry (including Diva, Hive, and the original Zebra), u-he designed Zebra 3 to bridge the gap between classic modular workflow and futuristic sound generation.
"With Zebra 3, our goal was not merely to add more features, but to remove the friction between a producer’s stray thoughts and the resulting audio output," noted a u-he development spokesperson during a recent developer briefing. "When you introduce features like Through-Zero FM and flexible feedback loops into an open-ended architecture, even a user with ‘no plan’ can stumble upon professional, commercially viable timbres within minutes."
Beta testers and sound designers have similarly lauded the synth’s modular flexibility, pointing out that its ability to handle complex internal routing without sacrificing CPU efficiency makes it an indispensable tool for both cinematic scoring and cutting-edge club music.
Future Outlook: The Evolution of Modular Software Design
As software synthesizers continue to evolve, the boundary between fixed-architecture plugins and fully modular environments is blurring. Instruments like Zebra 3 represent the vanguard of this movement, offering producers infinite routing possibilities wrapped in interfaces designed for tactile, immediate experimentation.
Looking forward, the integration of generative modulation sources, advanced randomized patch generators, and deeper MIDI velocity/MPE (MIDI Polyphonic Expression) integration will likely push producers further away from static preset culture. The future of electronic music belongs to those willing to turn off their internal editors, abandon their blueprints, and simply turn knobs to see what happens.