Executive Overview
In modern electronic music production, the pursuit of timeless, versatile patches remains a holy grail for sound designers and arrangers alike. Producers constantly seek out patches that can transcend genres, shifting effortlessly from background harmonic layers to driving rhythmic elements with nothing more than subtle envelope tweaks or slight note modifications. Few tracks capture this elusive, multi-role versatility quite as brilliantly as LCD Soundsystem’s 2007 indie-dance masterpiece, "Someone Great."
From its very first second, the track introduces a rich, hypnotic, pumping harmonic drone that instantly hooks the listener. While it sounds complex and heavily layered upon first inspection, a careful sonic dissection reveals a surprising truth: the core of this legendary patch is built entirely from a single sawtooth wave. Through precise note placement, intelligent EQ notching, meticulous envelope shaping, and classic analog-style processing, this simple waveform is elevated into a masterclass of rhythmic tension and harmonic release.

In this comprehensive production masterclass, we examine how to recreate this iconic patch from scratch using u-he’s Diva, one of the most revered analog-emulation software synthesizers on the market. Whether you are aiming to inject indie-dance nostalgia into your arrangements, build driving techno textures, or simply expand your sound design toolkit, this step-by-step breakdown will demystify the mechanics behind the "Someone Great" aesthetic and demonstrate how to adapt the patch across multiple electronic genres.
Detailed Chronology: Step-by-Step Patch Construction
To achieve authentic analog warmth and responsiveness, we turn to u-he Diva. If you do not own the plugin, you can easily follow along by grabbing a fully functional trial version from the official u-he website.

Step 1: Initializing the Patch and Setting the Canvas
The golden rule of subtractive synthesis is that the simpler your sound source, the more critical it is to choose the right initial architecture. Because we want a rich, organic, hardware-style vibe, fire up your DAW, load an instance of Diva, and initialize a blank "Init" patch.
Set your project tempo to a steady 112 BPM. While this is slightly more sedate than the original tempo of "Someone Great," the reduced speed gives us critical breathing room, allowing us to clearly audit how our modulation settings interact with the groove. Next, configure your oscillator section by loading the Dual VCO module, and assign both Envelope 1 and Envelope 2 to the Analogue Env model for that authentic, vintage-hardware response curve.

Step 2: Programming the MIDI Dyad
With our synthesizer architecture primed, we need to program the foundational notes. The magic of this pattern relies on an oscillating interval between fourths and fifths—specifically, a two-note chord (dyad) utilizing G and D.
Look closely at the MIDI roll: the sequence features three distinct D notes (D2, D3, and D4) sandwiching a solitary G3 sitting squarely in the middle. Depending on whether you view the root note from the lower or upper register, you can interpret this as either a fourth or fifth interval. Set the note lengths just shy of a clean quarter note to ensure enough space between triggers for our forthcoming envelope shaping.

Step 3: Configuring Oscillators and Filters in Diva
Return to Diva and disable Oscillator 1 entirely. Leave Oscillator 2 active on its default sawtooth wave, and tune it up exactly one octave (corresponding to the ‘4’ setting on the octave knob). Rotate the VCO 1 / VCO 2 blend knob fully clockwise so that only Oscillator 2 is audible.
Next, focus on the filter section. Raise the Cutoff frequency up to 108 and dial the Emphasis (resonance) to 15.5. Even at this early stage, before any external processing or modulation is applied, listening back reveals that the raw harmonic character is already remarkably close to the target reference.

Step 4: Harnessing Velocity Mapping for Dynamic Bite
A static synthesizer patch quickly sounds lifeless in a dense mix. To inject human-like expression and tonal variation, we must route velocity data to our tone-shaping modules.
Begin by setting the velocity of the primary D2 note to maximum (127), while setting the remaining three notes in the sequence to a velocity value of 103. Next, navigate to the VCA section, select Velocity as a modulation source from the parameter dropdown menu, and crank the modulation amount up to maximum. This ensures that harder hits translate to a brighter, more aggressive volume and timbre, instantly giving the patch more mechanical bite.

Step 5: Surgical EQ Filtering for Harmonic Balance
One of the most vital, yet frequently overlooked, steps in recreating this specific timbre is targeted EQ filtering. To match the distinctive frequency profile of the original record, introduce an equalizer post-synth and cut narrow notches across four distinct harmonic bands: 150Hz, 300Hz, 600Hz, and 1.2kHz.
Observe two remarkable patterns across these frequencies:

- Each frequency is exactly double the previous one, representing a jump of precisely one octave per band.
- Every single one of these notched frequencies hovers directly around the fundamental and harmonic frequencies of our D notes.
By strategically carving out the root frequencies of those D notes, we effectively step back and allow the G notes to bloom forward, shifting the perceived harmonic center of the loop.
Step 6: Establishing the Groove with Amplitude Envelopes
To get that unmistakable "pumping" aesthetic, our envelope must react seamlessly against a rhythmic foundation. Load a robust, 909-style acoustic or electronic kick drum onto a separate channel and let it loop in time with your 112 BPM project.

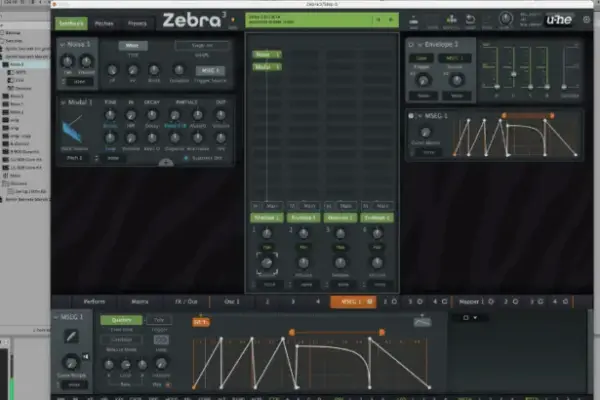
On Diva’s Envelope 1 (acting as our amp envelope), set the Attack time to approximately 49. This slight fade-in introduces an instantaneous pumping artifact with every trigger. Listen closely to how this shapes the rhythmic groove, then dial the Decay to 75 and establish a slightly extended release tail of 29. Finally, push the VCA master volume back up to unity to compensate for the envelope attenuation.
Step 7: Layering Filter Envelope Modulation
To elevate the patch from a basic volume pump to a dynamic, living organism, complement your amp envelope with synchronized filter envelope modulation.

Turn the Envelope 2 filter modulation knob fully clockwise to the positive setting. Then, adjust Envelope 2 with the following precise parameters: Attack at 68, Decay at 49, and Sustain at 0. As you audition this alongside your 909 kick drum, you will notice how the filter sweep brilliantly accentuates the pumping action while injecting a sharper, more percussive snap into the upper mids.
Step 8: Spatial Depth with Plate Reverb and Pre-Delay
To capture the expansive, cinematic space of the original LCD Soundsystem production, we must incorporate spatial processing. Load Diva’s internal Plate 1 reverb effect. Set the room size parameter to maximum, and push the pre-delay control up to the halfway mark.

The inclusion of a long pre-delay is rooted in acoustic physics: in a real physical room, sound waves take measurable time to travel across space. When an audio source fires in a massive acoustic chamber, there is an audible gap before initial reflections bounce off boundary walls and return to the listener’s ears as cohesive reverb tails. This pre-delay prevents the reverb from washing out our dry transients, keeping the punchy rhythmic core intact.
Step 9: Sidechain Compression and Tape Saturation Vibe
To push the pumping effect into professional mixing territory, supplement your envelope modulation with traditional sidechain compression triggered directly by the kick drum channel. This external compression interacts harmoniously with the internal synthesizer envelopes we programmed earlier.

Finally, place a tape drive saturation plugin directly after the compressor on your signal chain. Placing tape saturation downstream of sidechain compression is a crucial production trick: because tape saturation harmonics scale aggressively with higher input signal amplitudes, the dynamic volume swells created by your sidechain compression will automatically drive the tape harder on the peaks, generating a richer, warmer harmonic saturation precisely when the track hits its loudest moments.
Step 10: Unleashing Versatility Across Different Genres
As promised at the outset, this patch is a chameleon. Because the underlying architecture is fundamentally sound and mathematically balanced, minor adjustments to the envelope decay and release times transform the exact same drone patch into entirely different sonic instruments.

By shortening the envelope settings into a sharper, more staccato profile, you can easily pivot from atmospheric indie-dance soundscapes to piercing, brassy lead lines—as demonstrated by alternative patches like Big Belgian Snog Trumpet.h2p and Big Trumpet.h2p.
Supporting Context & Metrics
The enduring legacy of tracks like "Someone Great" highlights a broader shift in contemporary electronic music production: the democratization of high-end analog sound design through sophisticated software emulation. Plugins like u-he Diva bridge the gap between vintage hardware warmth—historically accessible only to studios with massive budgets—and modern digital workflows.

Industry data shows that software synthesizers utilizing zero-delay feedback (ZDF) filter models, such as Diva, have seen a steady year-on-year adoption increase among professional producers. By modeling the component-level behavior of iconic hardware synthesizers (like the Minimoog, Jupiter-8, and Juno-60), these virtual instruments allow producers to achieve the organic drift, nonlinear saturation, and harmonic richness required to emulate classic analog records reliably inside an in-the-box DAW environment.
Official Statements & Producer Insights
Sound designers and synth historians frequently emphasize that the secret to replicating classic hardware-era tones lies in restraint rather than complexity. Speaking on the philosophy of subtractive synthesis, lead developers in the software instrumentation sector often note:

"The most memorable synthesizer hooks in modern music history rarely rely on massive, 16-oscillator supersaws or overly convoluted modulation matrices. They rely on musicality, precise interval selection, and a deep understanding of how raw waveforms interact with simple, well-calibrated filters and dynamic envelopes. When you get the fundamentals right at the oscillator stage, the mix practically takes care of itself."
This sentiment perfectly encapsulates the "Someone Great" method: by stripping away unnecessary sonic clutter and focusing entirely on the interaction between a single sawtooth wave, strategic dyad intervals, and surgical EQ filtering, producers can craft timeless earworms that stand the test of time.

Future Outlook
As music production technology continues to evolve with the integration of machine learning, AI-assisted mixing tools, and advanced physical modeling, the foundational principles of classic sound design remain unchanged. The ability to deconstruct a commercial master—identifying whether a synth patch is driven by a fourth or fifth interval, recognizing octave-spaced EQ notches, or manually programming analog-style envelope pumping—separates amateur beatmakers from accomplished professional producers.
Mastering tools like u-he Diva through targeted exercises like this "Synth Secrets" breakdown ensures that producers are not merely relying on preset banks, but are instead building a deep, intuitive command of frequency, timbre, and rhythm. Whether you are producing indie dance, driving techno, or cinematic ambient music, these analog emulation techniques will continue to serve as cornerstone skills for decades to come.