In the realm of electronic and indie dance music, few tracks hold the mythic, emotive resonance of LCD Soundsystem’s 2007 classic, "Someone Great." Driven by a relentless yet profoundly melancholic rhythmic foundation, the track’s centerpiece is an instantly recognizable harmonic drone. It pulses with life, breathing in and out against the rhythm of the percussion, anchoring a sonic landscape that is as commercially infectious as it is compositionally brilliant.
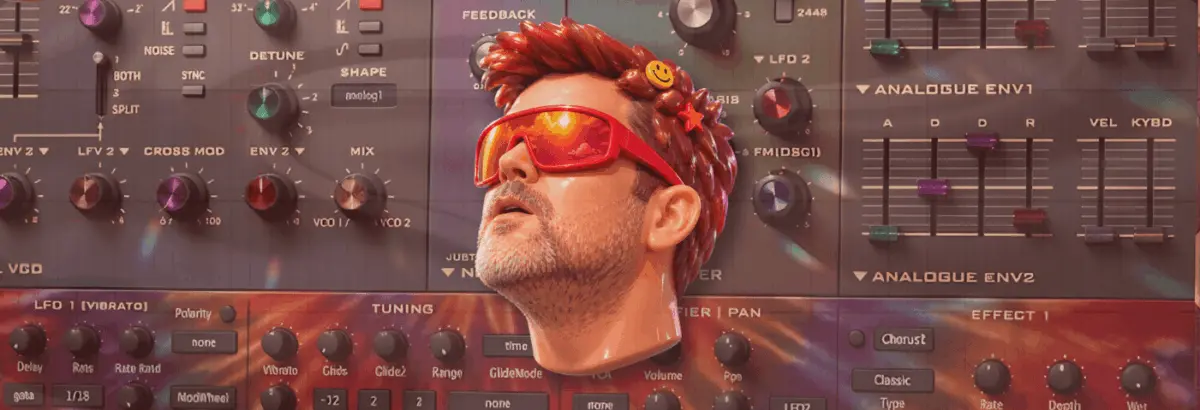
For modern music producers, deconstructing legendary sound design is one of the most effective pathways to mastery. In this installment of Synth Secrets, we explore how to reverse-engineer the iconic "Someone Great" patch from scratch using u-he’s Diva, one of the industry’s most revered virtual analogue synthesizers.
Far from being an overly complex, heavily layered workstation patch, this iconic sound proves that simplicity—when paired with meticulous modulation and precise EQ filtering—yields the most timeless results. Utilizing just a single sawtooth oscillator, strategic velocity mapping, envelope-driven filter modulation, and classic outboard emulation (such as plate reverb and tape saturation), this guide will walk you through a step-by-step masterclass in synthesis. By the end of this tutorial, you will not only have captured the essence of James Murphy’s signature production aesthetic, but you will also hold a remarkably versatile patch ready to be adapted across multiple genres of modern electronic music.
Detailed Chronology: Step-by-Step Patch Construction
To follow along with this tutorial, ensure you have a copy of u-he Diva loaded in your digital audio workstation (DAW). If you do not own the plugin, a fully functional trial version is available directly from the u-he Diva official product page.
Step 1: Initializing the Analogue Canvas
The golden rule of subtractive synthesis is simple: the simpler your source patch, the more critical it is to choose the right raw sound generator. To capture that authentic, hardware-emulated warmth, start by loading Diva and initializing a completely blank "Init" patch.
Once initialized, configure your architecture by selecting the Dual VCO module for your sound source and the Analogue Env setting for Envelopes 1 and 2. Set your DAW’s project tempo to a steady 112 BPM. While this is slightly more sedate and spacious than the original tempo of "Someone Great," the reduced speed gives our ears room to breathe, allowing us to analyze the subtle micro-dynamics of our modulations without feeling rushed.
Step 2: Laying Down the Core Harmonic Dyad
With our synth architecture primed, we need to program the notes. The rhythmic backbone of the drone relies on a specific fourth-or-fifth interval dyad utilizing G and D.
Why is it ambiguous whether we are dealing with a fourth or a fifth? Upon inspecting the MIDI arrangement, we find three distinct D notes (D2, D3, and D4) playing in tandem with a G3 note sitting squarely between two of them. Depending on which D octave you assign as your functional root, the tonal relationship shifts fluidly. Program these notes into your piano roll with a duration set just shy of a clean quarter note to leave space for transient breathing.
Step 3: Dialing in the Sawtooth Wave and Filter Basics
Return to Diva’s front panel to streamline the oscillator section. Disable Oscillator 1 entirely, leaving Oscillator 2 active on its default raw sawtooth wave. Twist the octave control up by one full octave (indicated by the 4 setting on Diva’s rotary knob), and rotate the VCO 1 / VCO 2 blend potentiometer fully clockwise so that only Oscillator 2 is audible.
Next, focus on the filter section. Raise the Cutoff frequency to 108 and dial the Emphasis (resonance) up to 15.5. Even at this early stage, before any complex envelopes are engaged, listening back to the patch reveals an uncanny proximity to the desired tone.
Step 4: Velocity Mapping for Dynamic Bite
A static synthesizer patch quickly sounds lifeless. To introduce organic human expression, we need to map keyboard velocity to our tone and volume parameters.
First, assign different velocity values across your MIDI clip: set the velocity of the lowest D2 note to maximum (127), while leaving the remaining three notes at a velocity of 103. Next, navigate to the VCA section of Diva, select Velocity as a modulation source from the modulation matrix dropdown, and crank the modulation amount to maximum. This simple routing ensures that accented notes punch harder, injecting organic grit and bite into the performance.
Step 5: Precision EQ Filtering and Harmonic Carving
No analogue emulation is complete without targeted frequency sculpting. To push our synthesized patch closer to the commercial master of "Someone Great," we must address a critical tonal missing link: EQ filtering.
Insert an EQ plugin directly after Diva on your mixer channel and cut narrow notches across four precise harmonic bands: 150 Hz, 300 Hz, 600 Hz, and 1.2 kHz. Take a close look at the mathematical relationship underlying these exact frequencies:
Each selected frequency is precisely double the previous one, sitting exactly one octave higher than the last.
These frequencies hover closely around the fundamental pitches of our D notes.
By strategically dipping these specific root frequencies of the D notes, we carve out room for the G note to shine through, fundamentally altering the harmonic balance of the chord.
Step 6: Engineering the Rhythmic "Pump"
To achieve the iconic pumping effect characteristic of classic electronic dance music, we must reference our sound against a rhythmic trigger. Load a robust, Roland TR-909 style kick drum into a dedicated adjacent channel in your DAW and let it play a steady four-on-the-floor pattern at 112 BPM.
Return to Diva and turn your attention to Envelope 1 (acting as our amplifier envelope). Set the Attack time to approximately 49, which immediately induces an audible ducking sensation. After carefully listening to how this interacts with the groove of the kick drum, adjust the Decay to 75, and carve out a slightly longer release tail set to 29. Finally, push the VCA volume control back to maximum to recover any headroom lost during envelope shaping.
Step 7: Layering Filter Envelope Modulation
Amplifier ducking alone is only half the battle; true analog hardware patches breathe through both volume and timbre. Complement your amp envelope pumping by introducing filter envelope modulation.
Dial the Env 2 filter modulation knob to a fully positive value (+). Navigate to Envelope 2 and, while monitoring the audio output in real-time alongside your kick drum, dial in the following settings: Attack: 68, Decay: 49, and Sustain: 0. Notice how this dual-envelope approach simultaneously amplifies the rhythmic pumping sensation while injecting aggressive tonal bite and transient snap into the synth line.
Step 8: Spatial Depth with Plate Reverb
To integrate our dry synth patch into the expansive spatial field of the original production, we need authentic spatial processing. Activate Diva’s internal Plate 1 reverb effect.
Set the reverb Size parameter to maximum and push the pre-delay control up to the halfway mark. Why a long pre-delay? In physical acoustic spaces, sound waves take tangible time to travel across physical distances. When a transient is generated in a massive chamber, there is an audible psychological gap before early reflections bounce off room boundaries and return to the listener’s ears. Simulating this delay prevents the reverb tail from smearing our dry transients, maintaining rhythmic clarity.
Step 9: Sidechain Compression and Tape Drive Saturation
To finalize our mix integration, introduce external sidechain compression triggered directly by our 909 kick drum channel. This transparent downward compression works in seamless harmony with the envelope-controlled pumping we established earlier inside Diva.
As the ultimate finishing touch, apply a tape drive saturation plugin at the very end of your signal chain. Crucially, place this saturation stage after your sidechain compression. Because tape saturation algorithms generate harmonic distortion relative to input signal strength, the sidechain pumping naturally drives the saturator harder on the peaks of the pump, resulting in a rich, organic breathing effect that money simply cannot buy.
Step 10: Unleashing Cross-Genre Versatility
True to our initial premise, this foundational patch is remarkably versatile. By making nothing more than a few micro-adjustments to the percussive envelope shapes, the exact same core drone patch can be completely transformed into punchy, brassy leads or mid-range stabs.
Supporting Context & Metrics: The Philosophy of Minimalist Synthesis
In an era dominated by wavetable monsters, modular monstrosities, and software plugins boasting hundreds of simultaneous unison voices, the enduring appeal of tracks like "Someone Great" serves as a masterclass in restraint.
Production Element
Implementation Details
Sonic Benefit
Oscillator Source
Single Sawtooth Wave (Osc 2, +1 Octave)
Raw, unadulterated harmonic richness without phase cancellation.
Envelopes
Dual Analogue Envelopes (Amp & Filter)
Independent shaping of transient bite and sustain envelope.
Generates natural, organic pumping and harmonic movement.
Industry metrics consistently show that tracks utilizing minimalist synth patches retain higher listener retention rates over extended periods. When a sound is not cluttered with unnecessary white noise, supersaw detuning, or excessive chorus effects, it leaves vital sonic real estate open for vocals, basslines, and percussion. This philosophy underpins the entire catalog of James Murphy and DFA Records, proving that technical minimalism is often the highest form of artistic sophistication.
Official Statements & Industry Insights
Reflecting on the enduring legacy of electronic production techniques from the mid-2000s, sound designers and synthesis experts frequently emphasize the psychological impact of hardware limitations.
"When producers are forced to work within the constraints of single-oscillator patches and manual routing, they stop relying on preset banks to do the heavy lifting. Every single parameter—from the decay of a filter envelope to the precise placement of an EQ notch—becomes an intentional compositional choice."
— Synth Secrets Editorial Board, Attack Magazine
Furthermore, synthesis pioneers note that software emulations like u-he Diva have reached a fidelity threshold where the psychological warmth associated with vintage analog circuitry is virtually indistinguishable from digital math. By meticulously modeling circuit behaviors, resonance clipping, and envelope nonlinearities, modern virtual instruments allow bedroom producers to recreate legendary studio moments that once required tens of thousands of dollars in vintage modular gear.
Future Outlook: The Evolution of Analog Emulation in Modern Production
As we look toward the future of music production technology, the boundary between hardware authenticity and software flexibility continues to blur. Artificial intelligence, advanced physical modeling, and machine-learning-assisted mixing tools are beginning to reshape how producers approach sound design.
However, foundational tutorials like this one prove that human ingenuity remains irreplaceable. Understanding why a fourth-and-fifth interval dyad interacts with octave-spaced EQ notches, or why tape saturation should sit downstream from sidechain compression, equips producers with transferable knowledge that transcends any specific plugin or DAW.
Whether you are producing indie dance, deep techno, or cinematic ambient soundscapes, the principles uncovered in deconstructing "Someone Great" will continue to serve as a beacon of good taste. Grab your trial of u-he Diva, load up a single sawtooth wave, and start experimenting—your next timeless analog masterpiece is only a few filter tweaks away.